Rendering

Harpers Bazaar and a BMW rendered in Corona A7

HP-Spread-1.jpg

A couple of pieces to report this month, firstly I went to EUE in Utrecht back in June, as usual it was great to catch up with the CG heads and learn lots of interesting things about 3D. Particular highlights were meeting Eric de Broche of Luxigon fame and Nils Norgrens from Neoscape's talk on leadership and starting a company. Write up coming soon. Whilst I was at EUE I bumped into Adam Hotovy who was kind enough to give me an early release of Corona A7. I took it for a spin with the new BMW i7. Corona is unbelievabley easy to use, get the conversion script from the forum and pretty much hit render and your good. I left it overnight and this is what I got, I did some minor color adjustments in Photoshop, but here that is now built in to the release version.

Img---BMW


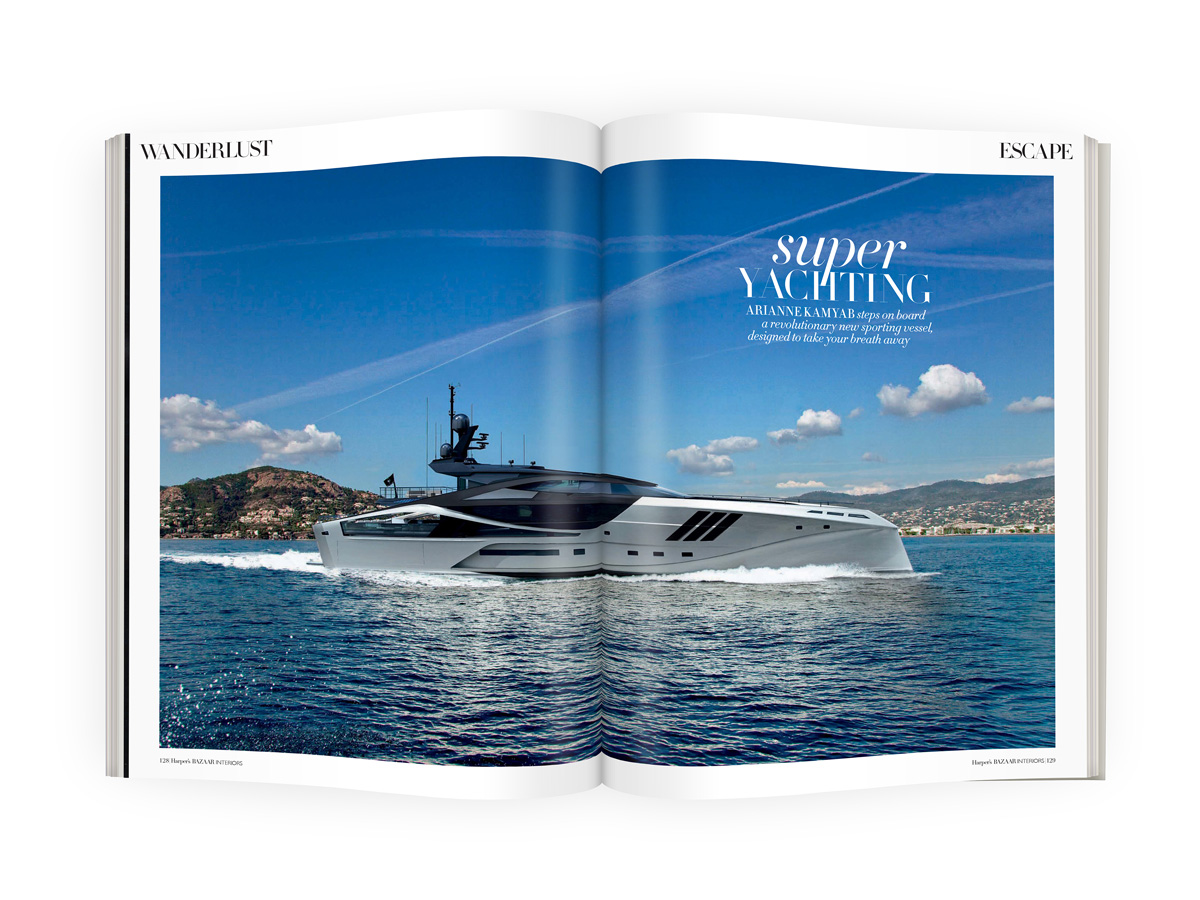
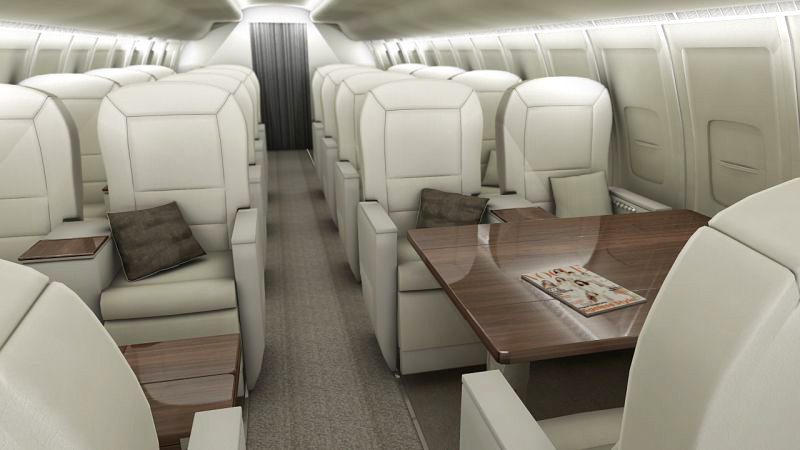
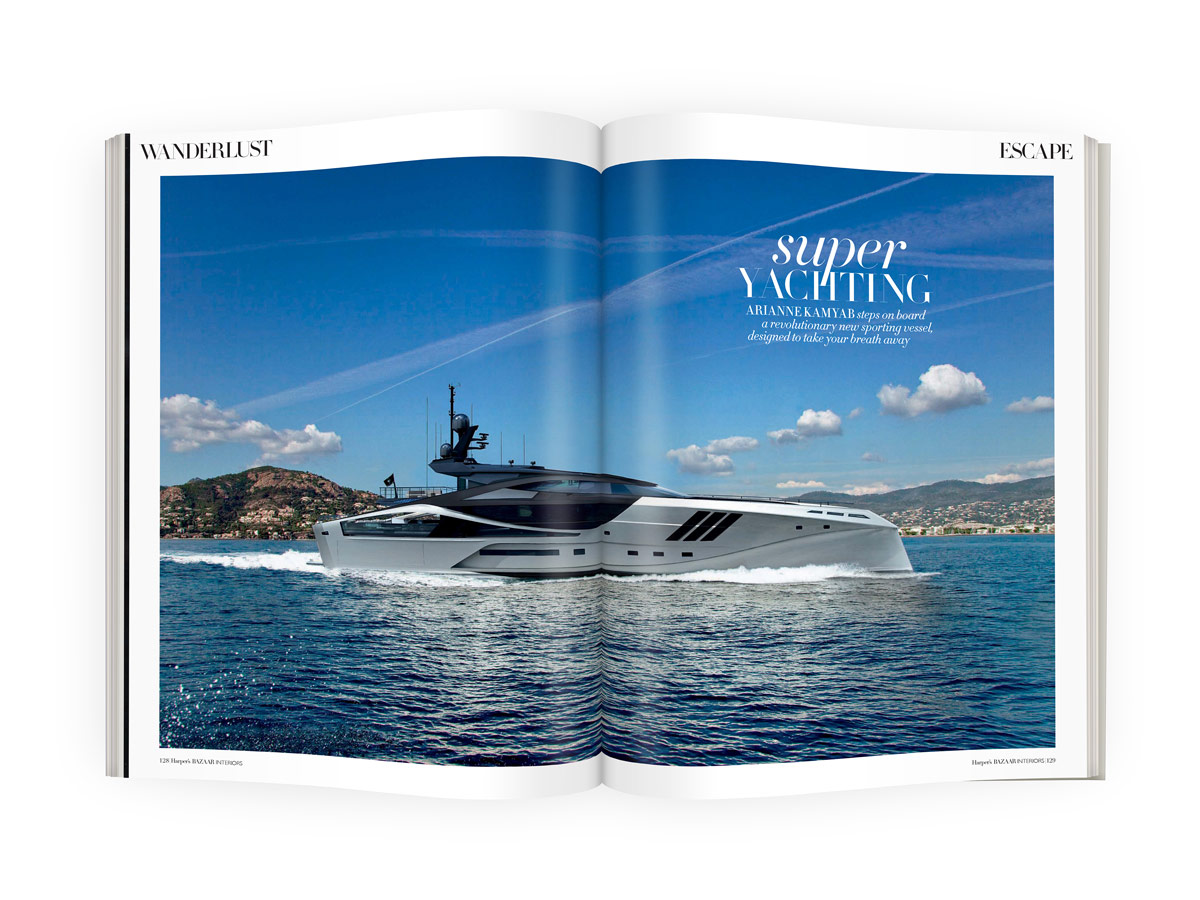
Harpers Bazaar also did a piece on the super yacht I have been working on recently. The images they used included a double page spread and some older interior images.


HP-Spread-1

HP-Spread-2

Aston Martin Rendered with Keyshot and Mental Ray

Here are the first few images of an Aston Martin rendered with Keyshot and Mental Ray . The first two images of the Aston Martin Vantage are rendered in 3ds Max with Mental Ray and a HDRI environment, later on in the post the Aston Martin is rendered with Keyshot. The feedback on the studio shots are that as the car is in a studio the reflections should be of lights and not of an environment. Aston Martin Mental Ray Jaked3d

Aston Martin Mental Ray Jaked3d2

Below is the next stage of the Aston Martin rendered with Keyshot. In this render I used Keyshot rather than Vray or Mental Ray and 3ds Max. It has proved to be a great learning experience, proving to me that Keyshot is an extremely quick and powerful tool. I also used HDR studio which I highly recommend. The next step for this project will be trying out Vray, 3ds Max and HDR Studio with higher resolution HDR images and backplates. As well as using the problems I encountered during this stage to improve the workflow in future. I hope to revisit this project when I can find time.

Aston Martin Keyshot Jaked3d

Here is a quick update image using Vray in a full 3D environment. That is three render engines and counting! :)

Aston Martin Parked

NOX Free Render Engine

nox-renderer
"Nox Renderer is a rendering software based on unbiased methods. Development is currently in beta stage." Evermotion.org
NOX Renderer is available for download here.

This is how I got on with NOX renderer in 3ds Max, this is not so much a review but my first impressions. Once the Renderer is downloaded and you have also installed the Material Library open up 3ds Max and choose NOX as the render engine.The next step was to set up the scene, I used the Fendi Dorchester Chair which you can download here. The Sunlight System is in the Standard Lights Menu in 3ds Max and Camera is in the Camera Menu.
Materials
Next up was applying the materials. Open up the Material Editor in 3ds Max and click on Standard and choose Nox Material. The material Libery that comes with Nox is very nice. I then applyed the fabric to the chair and wood to the legs and floor.Blury

After hitting Render this is what I was getting, in fact it was a lot more over exposed. Also I turned off Real-World Scale in the UV Maps on the Chair. The problem was with the exposure, aperture and camera distance. Once I had adjusted these three I got the render below which took 21 minutes.I found Nox Renderer nice and simple to use and I am looking forward to working with it more in future and seeing it develop. 21min_final NOTE. After writing this post Evermotion have posted some tutorials here. Check them out, there are some great features and you will probably get on better than I did.

Basic Compositing in Post Production

I recently completed a couple of new interior renders for an Avro RJ using 3ds Max and Mental Ray. So I thought this would be a good time to explain the basic Photoshop Postwork I go through.

1evp88

Compositing in post production is one of the most important and probably most over looked parts of CG. It was only recently I started compositing different renders to improve the quality of my final images, so I am in no way an expert but this is how I composite my images.

The most important thing is lighting, something that I am yet to master but here are some great links to get you on your way. 8 Tutorials To Make You Fully Understand 3D Lighting In CG. But this will only get you as far as the render output on the image above.

Adjusting the Levels (Image > Adjustments > Levels) in Photoshop will make sure you are getting the most colour range out of your image. Render3ao

Rendering out an Ambient Occlusion Pass from your 3d application is one of the best ways to improve results. The render will look something like the one here. Put it on top of your image in Photoshop and Multiply or Overlay it in the layers, you can also adjust the opacity. I then duplicate and merge the layers and adjust the Levels and the Brightness and Contrast.

When rendering out of 3ds Max I have found the images could do with crisping up. To do this add a Unsharp Mask. (Filters > Sharpen > Unsharp Mask)


Render3zd

To get a Lens Blur or Depth of Field you will need to render out a Zdepth pass. The output should look something like this one. You can override all materials instead of replacing them in 3ds Max (Render Setup > Processing > Material Override > Check the Box and drag the material in.) The last thing I do is adjust the contrast and save the image out. There is so much more you can do but here are the basics of what I generally do.


How to Model, Texture, Light and Render a Macbook in 3ds Max

MacPro.jpg

I have a series of lectures coming up and one of them will be Modelling a Macbook in 3ds Max, here is the first attempt. This video is at about 10x speed and shows how to set up blueprints and model the Macbook using simple primitives and pro boolean. I am not the biggest fan of boolean but in this case they proved very effective. http://www.youtube.com/watch?v=3fbc_jj8MXg In the second video of the series I go through Texturing, Lighting and Rendering a Macbook in 3ds Max. This time it is a brief introduction to materials and texturing. Again the video is at about 10x the speed and shows a simple Mental Ray setup for rendering, materials and adding an animated texture to the object.

http://www.youtube.com/watch?v=stxr7l-yZxM

You can also buy my model from turbosquid.