Plugins

3ds Max Cleaner, Remove Missing Plugins and a cool iPhone App and More

Here are a few things I have learnt this month.unlink1. If you can not Group objects in 3ds Max then with the objects selected hit the unlink button on the left of the main toolbar. Then try and group it and it should work. This happens to me when I import files from AutoCAD and other software. 2. Camera Converter. To quickly add cameras I hit Ctrl+C in the 3ds Max viewport this is great when selecting views with others. But if you are using Vray it can be a pain to line the Vray Physical Camera up. This is where Anything to Physcam from Lele's Vray Tools on script spot is really great. There is a good video on how to use it from Alex over at Vray-Studio.

3. Cleaner. I was having trouble with a scene that was taking ages to load and save. I also had to turn off autoback and it really got hard to work with. Then I found Cleaner on script spot. This amazing tool got my file down from around 1gb to 200mb! touchmouse2-245x3004. Remove Missing Plug-ins. I started to use Rebus Farm and I had a plug-in that Rebus did not. They are quite good with having Plug-ins but I could not send it until I sorted it. This can be quite a pain to resolve, but not with Remove Missing Plugins from Martin Breidt. Really easy to use and extremely useful.

5. How to setup Depth of Field in 3ds Max. A great reminder on setting up a DOF pass in 3ds Max from Onno Van Braam.

6. Wireless Trackpad and Keyboard iPhone App. This great app from Logitech turns your iPhone into a mouse and you can type to. This is handy when watching films on the TV from the laptop and not wanting to have to move.

Top 5 Free 3ds Max Scripts and Plugins

Recently I have been trying out quite a few scripts and plugins to speed up my work flow in 3ds Max. I highly recommend browsing scriptspot.com for useful scripts. But to save so time and kick you off here is what I have been using recently. Please note that not all of these are available on Sciptspot but there is a link to each download. So in no particular order here are my Top Five Free 3ds Max Scripts and Plugins. Wireframe Render jokermartini.com/2010/04/30/wireframe-render/ Wireframe Render is a script from John Martini over at jokermartini.com. I have found this one very useful for creating wireframe renders for Turbosquid for example. Wireframe Render uses a simple interface that enables the user to quickly and easily create wireframe renders. I would also recommend checking out some of John's other cool tools available at jokermartini.com/extras/ including cobwebs and Select Intersectors.

WireFrame max1
Render Mask www.scriptspot.com/3ds-max/scripts/rendermask Render Mask allows you to quickly render masks such as object ID's and Materials ID's which I find extremely useful. It is possable to do this in 3ds Max Render Elements but this is handy after you have rendered and maybe you need to get a mask without re-rendering. This plugin is a massive time saver when trying to create varous types of masks for use in post production. It is by Ivan Tepavicharov and this video should explain how to use it.

https://vimeo.com/26107414 Center and Reset www.scriptspot.com/3ds-max/scripts/frodos-magic-scripts-pack This neat script is from Frodo's Magic Scripts Pack. It resets the xform on an object and centers the pivot point in one click. I use this alot and find it to be a big time saver.

Copitor www.scriptspot.com/3ds-max/scripts/copitor This has to be one of my favourites. I have posted about Copitor before here and I am still using it all the time. Copitor lets you copy and paste objects between 3ds Max scenes. I also find it useful to grab the material off the object rather than having to export it.
Create.jpg1734c757-7eae-443a-b500-f8ddf77cc004LargeIvy Generator www.guruware.at/main

Ivy Generator hass been around for a while now and I think it is great. I am always looking out for places I can put it in my scenes because it looks great and it is so easy to use. It is also very customisable with your own leaves etc. Here is a great video tutourial from Sachin Joshi over at CGTuts.

Autodesk 123D Catch Beta

123D Splash
I was very excited to hear about Autodesk's 123D Catch. 123D Catch lets you take ordinary photos and turn them into 3D models. Here is a quick introduction.

http://www.youtube.com/watch?feature=player_embedded&v=6aU2s85Zw3A

recieved

So I downloaded the software from here. The software comes with some good tutorials and the program is pretty straight forward to use. For the object I wanted to create I took 42 photos spinning around the object. I uploaded them and waited for Autodesk to email to let me know it was completed. A couple of the images were too dark so the object I received was not 100% but 42 images is probably the minimum I would suggest.

It looked pretty good if I do say so myself. Next, what I was most excited about was getting it into 3ds Max. This was simple, File, Export, FBX and import into Max, this is what I got below.


import

The scene contains cameras where all the shots were taken from, which could come in handy. I then opened up the Material Editor and selected the material from the object. There were two in this case. The file Autodesk emailed me contained to texture sheets which I remapped to the correct location and below are the 2 texture sheets and the result i got.


textures
I then added a Mental Ray Daylight system and applied a smoothing group to the whole object and rendered. Below are the results. The mesh was very heavy and if I had more time I could have cleaned it up a lot and patched up any broken areas in the model.
render wire
Catch 123D is an amazingly powerful tool which I am sure will come in handy in future. Definitely give this free software a try and let me know how you get on.

Copitor is a must have for a 3ds Max user

MXS_CopitorCopitor is a 3ds Max script by Mathieu Jacquin which allows you to copy and paste selected objects to another 3ds Max scene or to another window if you have more then one 3ds Max open. It is also useful to back an object up before you try something, such as booleans! You can download it here.

To install... Drop The file in max viewport and go to Customize ==> Customize User Interface ==> Category: zOffTy Tools ==> Copitor

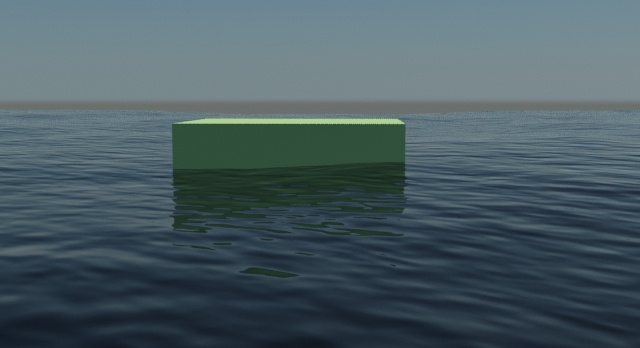
Creating an ocean in 3ds Max using Wave Generator

Test scene2

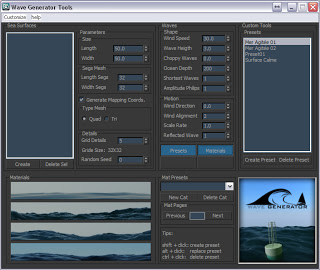
waveGeneratorTool_01Wave Generator is a Plugin written by Ruben Mayor and Philippe Jadoul for 3ds Max. Very quickly you can generate ocean surfaces including control over waves. The plugin is currently in alpha version. We needed a solution to create various oceans surfaces. Wave Generator gave me the ability to create the ocean as a 3d object then add materials or even export it to other applications.  I found it very straight forward to work with and in 3ds Max I just add a daylight system and a generic mental ray water material to create the image above.

You can download Wave Generator here.

NOX Free Render Engine

nox-renderer
"Nox Renderer is a rendering software based on unbiased methods. Development is currently in beta stage." Evermotion.org
NOX Renderer is available for download here.

This is how I got on with NOX renderer in 3ds Max, this is not so much a review but my first impressions. Once the Renderer is downloaded and you have also installed the Material Library open up 3ds Max and choose NOX as the render engine.The next step was to set up the scene, I used the Fendi Dorchester Chair which you can download here. The Sunlight System is in the Standard Lights Menu in 3ds Max and Camera is in the Camera Menu.
Materials
Next up was applying the materials. Open up the Material Editor in 3ds Max and click on Standard and choose Nox Material. The material Libery that comes with Nox is very nice. I then applyed the fabric to the chair and wood to the legs and floor.Blury

After hitting Render this is what I was getting, in fact it was a lot more over exposed. Also I turned off Real-World Scale in the UV Maps on the Chair. The problem was with the exposure, aperture and camera distance. Once I had adjusted these three I got the render below which took 21 minutes.I found Nox Renderer nice and simple to use and I am looking forward to working with it more in future and seeing it develop. 21min_final NOTE. After writing this post Evermotion have posted some tutorials here. Check them out, there are some great features and you will probably get on better than I did.

New Multi Control App, 3D Connextion, Wacom and the Ipad

Maide Inc have come up with this great way of using the ipad and iphone with 3ds Max and Maya.http://www.youtube.com/watch?feature=player_embedded&v=BI_pnzES7F0 http://www.youtube.com/watch?feature=player_embedded&v=V7V-UkDQUQo

wacom-intuos3-6-x-8-inch-pen-tablet

I saw this metioned on Evermotion in their monthly newsletter and gave it a go at work. Not being an Ipad or Iphone user the intuitive functionality did not come as easy as if I had experience with the 2 devices. The Maide Control needed a bit of a learning curve but does have a lot of potential. I got very excited and thought about purchasing an Ipad instead of the Space Pilot Pro I have been dreaming of for a while now. I am currently using the Space Navigator and a Wacom Intuos 3

I started looking into Ipad/Wacom alternatives, there was not as many as I thought there would be. I found a few things of interest then I stumbled upon this actually made by Wacom. http://www.youtube.com/watch?feature=player_embedded&v=tbuZ_ulQfLA So being very comfortable and happy with both my Space Navigater and Wacom, but being due an upgrade at some point this year is it worth combining the 2 and having only one device on the desk, plus having all the other functions the ipad has? Is it worth the learning curve? Or should I look at this as great potential and go for what I know and love. I have been looking for an excuse to get an Ipad for a while now and as I am looking for a mobile phone contract to use in Monaco, maybe an Ipad could be the way to go instead of an Iphone.